Sunday, April 25, 2010

More Glass and Cast


I had a dream last night that my painting "Water Glass and Carrots" 11"x14", oil on linen, would look better if I added a pair of glasses, so when I woke up this morning that's the first thing I did. That's a wrap on this one.
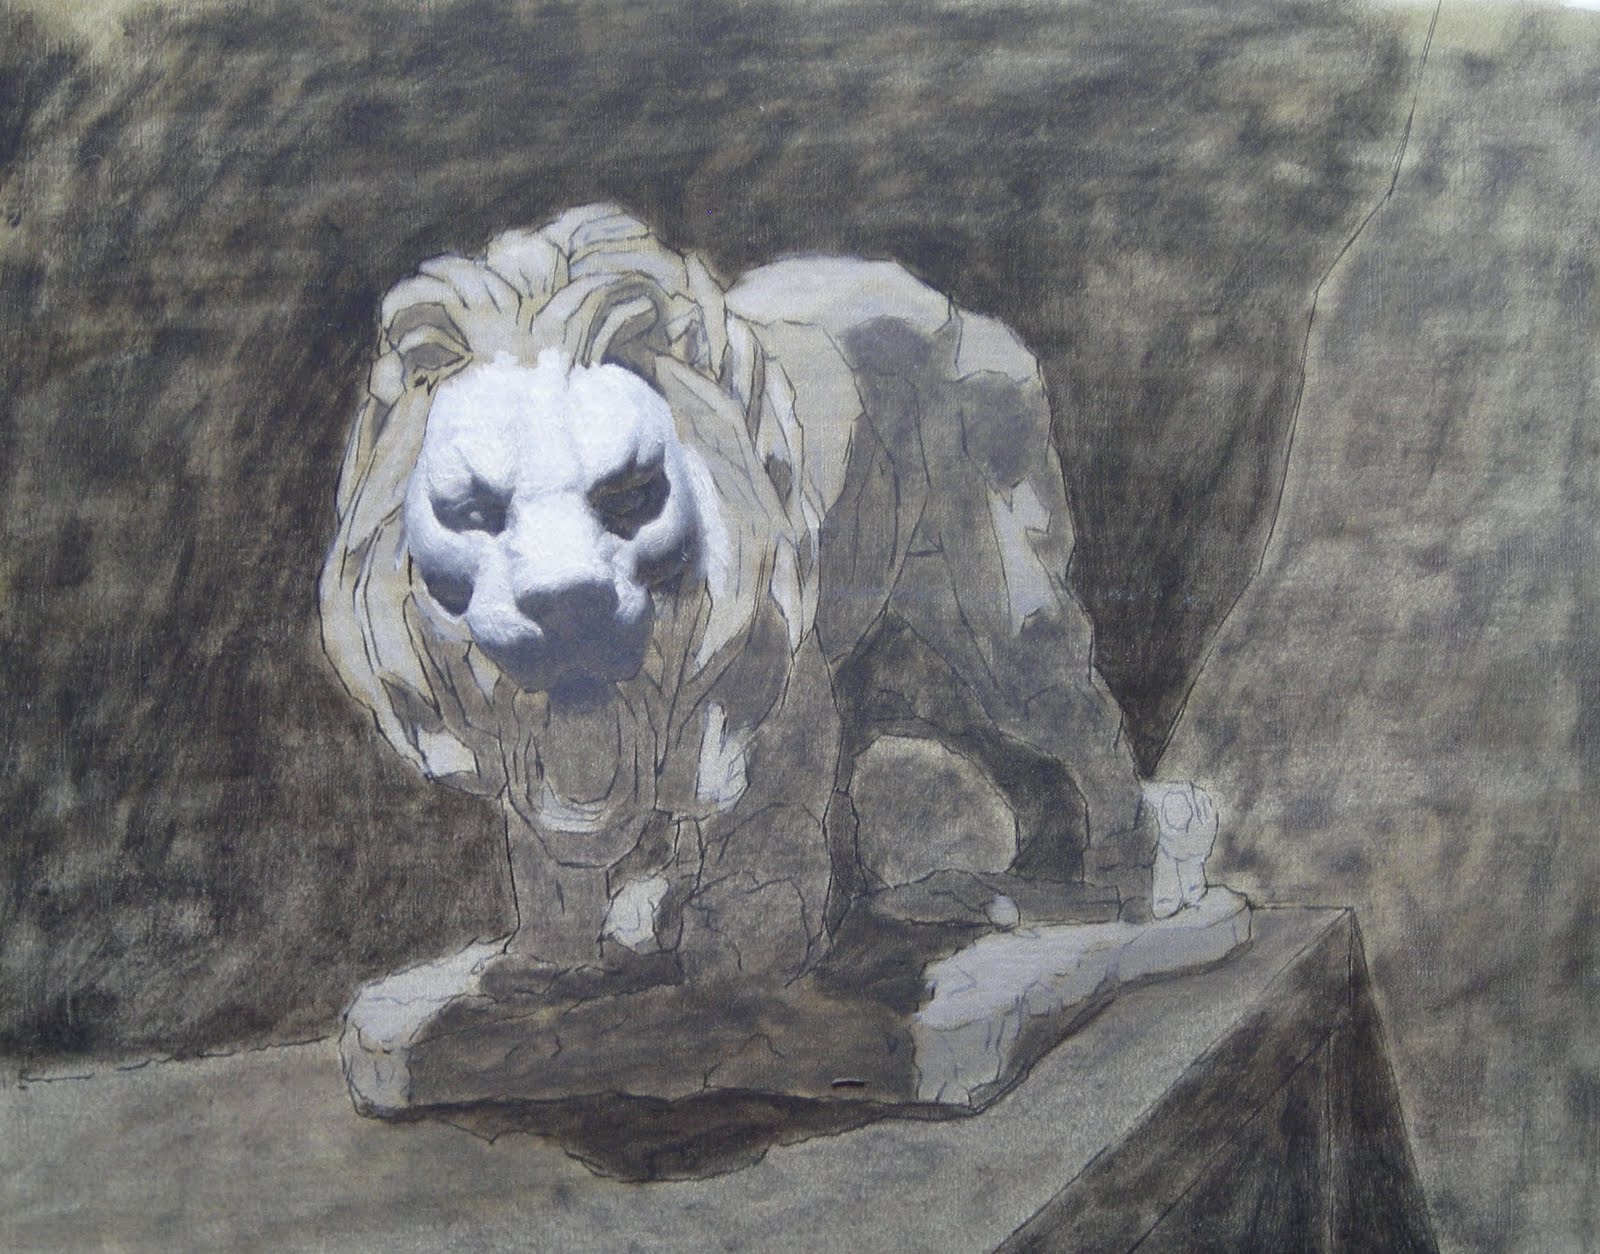
I'm slowly crawling across the form of the lion. I decided to start with the top of the face and then fan out from there, just in case I don't get to finish the entire body, I'll still have the center of interest. It's very difficult to judge the value of turning forms that are parallel to the light source and adjacent to light areas. They either look darker than they really are or washed out. I stuck with that right cheek until I worked it out. My figure drawing instructor, Sam, blew my mind by pointing out to me how subtle forms on the figure throw cast shadows that affect the look and feel of the terminator line and give valuable insights about the form before you even start modeling. Once I started really seeing it my eyes started spinning in my head. So many things to take note of it's mind boggling.

Thursday, April 15, 2010

More Glass and Carrots


A bit more work on this one. Background and table will be next and then it's time for some tweaking here and there. It's a little sunken in so I won't know until I oil out near the end what parts are working and which areas need more work. I like to oil out by using a mix of 60% oms to 40% refined linseed oil. I brush it on and then gently pat most of it off with a Viva paper towel. I also found that the last oil out is the best time to take the final photo because the colors are up without looking too glossy as it does when you spray with retouch varnish, so you don't get the glare spots.

Tuesday, April 6, 2010

More Water Glass


I'm a bit further along now. I started with the carrots, perishables first, than the glass and small goblet. I tried to get the carrot color exactly right without overdoing the detail. I want the water glass to be the main attraction, even though the carrots have a lot more chroma. Kind of like a Watteau painting where Gilles manages to stand out in spite of being surrounded by colorful characters.

Sunday, April 4, 2010

"Apples" and "Water Glass" Rub-In


Here's the finished painting "Apples and Jug", oil on linen, 9"x12", and the underpainting for "Water Glass and Mirror", 11"x14". The apple painting is not quite as dark as it looks here. I darkened it down in photoshop to get rid of some of the glare. I'm going to have to give it another go before I post it to my website. It's taking me a little bit of time to figure out the nuances of my new studio lighting arrangement. The "Water Glass.." on the other hand looks exactly right, go figure. My process on the water glass so far was to make an exact size, pencil drawing , using the straight line method of blocking-in. Then I traced it and transfered it using hard vine charcoal. Next I inked the drawing and did an open grisaille wipe out using burnt umber and black (the black keeps the paint from drying up too quickly). Today I managed to get a few hours in before the holiday guests arrive, and I rubbed in the basic color scheme. I find this technique to be working very well for me and I may stick with it for a while. I'm pleased with the way the frottis (rub-in) came out. It already has the feel that I want the finished piece to have, so I have to remember to keep the overall simplicity and the "big look" as I begin to windowshade in the form painting and details.

Wednesday, March 31, 2010

Water Glass and Mirror


Heres the wipeout (linen,11"x14") and poster study (canvas board, 5"x7") for a new set up. Originally I had planned to do a colored ebauche (underpainting) over the wipeout, but I went back into this wipeout a little more than usual because of the complexity of the arrangement, so I'm thinking I might just windowshade without the ebauche since I can use the poster to gauge my colors. I'm also worried as to how long I have before those carrots start to look brown.
I'm using a new lighting setup. I have two four foot GE sunshine bulbs over my easel and a compact flourescent daylight bulb pointed at the still life. I'm liking the way the colors look under the easel but I would like to get a little more intensity and warmth onto the still life. An artist who's work I greatly admire informed me that he uses a homemade fixture that holds five compact flourescents with most of the bulbs rated at 6500. He gave me a link to a similar bulb lamp at B&H photo, but I think I will try to build one myself. Why all this playing around with the lights? I'm trying to develope some paintings with a softer more delicate lighting similar to what I experienced when I did some daylight paintings last summer. Ideally, I would use north light, but the window in my studio is west and most of the time that I have to paint is at night so I want to set up conditions that are more reliable.

Sunday, March 28, 2010

Lion Cast


This is the poster study and the ebauche for a new cast painting that I've started at GCA. I decided to use a rubbing in technique on this one rather than a wipe out or a thinned down full color stain. I'm only part way through the ebauche because I only had three hours and it took me a while to complete the poster (5"x7") .The actual painting is 11"x14" my largest one to date. The cool thing is that since I've done quite a few of these now I'm being given a little latitude so I'm approaching it more like a still life . Most cast paintings don't bother too much with the background. The poster actually has areas of pure white in it which shows the limitations of pigment and digital photography. I'm going through a lot of experimentation with the lighting setup in my studio and I'm getting good results which I'll post here in the near future. I wish I knew where this lion came from I haven't had any luck matching the image.

Thursday, March 25, 2010

More Apples

It's taken me a while to get back to those apples, fortunately they haven't completely rotted. In fact, they've developed a wonderful patina of colors that I've been working hard to try and capture. This paintings been a bit of an experiment as I've been trying out different lighting setups. My normal arrangement is to shine a spotlight on the still life while my easel is placed under two four foot long flourescent bulbs. One cool (bluish) and one warm (pinkish), This time I decided to try working under the same light as the still life so that I could match the colors exactly. Using a spot light on the easel proved to be too glaring so I went back under the flourescents but I added a 25 watt candescent clip-on lamp. I like the way the colors look on the easel, but I'm not sure that that's the way they would be lit in a gallery setting or home. It's not that I've been unhappy with the way that my paintings have been coming out, it's just that I've been reading a lot of munsell based color theory lately and it's got me questioning some of my basic assumptions. For instance, in this painting I was thinking a lot more about chroma than usual and I used some neutral value mixtures to lower the chroma rather than earth colors which is my usual way. The other problem is photographing the work. When I work under the flourescents the photos come out great but when I use the incandescent and then photograph using the flourescents alone, horrible. This photo was taken using the light that I was working under(flourescents and incandescent) and the colors look pretty close but I'm getting glare. I'll figure it out eventually. One thing that I'm realizing is that the painting and still life don't necessarily have to be made under the same light, the painting just has to match what I'm seeing, however it's lit. I'll see how things work out when I'm all finished.